Spring Security と Keycloak を使ってリソースサーバーを作ってみた
リソースサーバーを作ってみようかと思い立ちまして。
全体のイメージはこんな感じで考えています。

クライアントはcurlコマンドを使ってリソースオーナーパスワードクレデンシャルフローでアクセストークンを取得します。リソースオーナーパスワードクレデンシャルについてはこちらでわかりやすく解説されてました。要約するとユーザーのパスワードをクライアントから直接渡して、アクセストークンをもらうフローですね。
リソースサーバーはクライアントから送られてきたアクセストークンをKeycloakの公開鍵を用いて検証します。
Keycloakの設定
Keycloakの設定をしていきます。KeycloakはDockerを使って立てます。
https://www.keycloak.org/getting-started/getting-started-docker
こんな感じで起動させました。
docker run -d -p 8081:8080 -e KEYCLOAK_USER=admin -e KEYCLOAK_PASSWORD=pass --name keycloak quay.io/keycloak/keycloak
リソースサーバーを8080ポートで起動させたいので8081ポートを使用するように指定しています。
localhost:8081 にアクセスすると Administration Console でログインできるようになっているので、dockerコンテナを起動させたときに指定したユーザーとパスワードを用いてログインします。

では、認可サーバーとして設定を行っていきましょう。
やらなくてはいけないことは次のとおりです。
- Realm の作成
- クライアントの登録
- スコープの追加
- クライアントへスコープの割当
- ユーザーの追加
他にも色々できることはあるんですがそれはおいおいで。
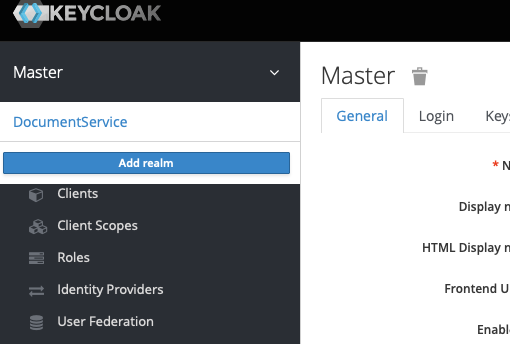
まず、Realmの作成です。RealmというのはKeycloakがユーザーやクライアントなどを管理するまとまりのことで、サービスごとに一つみたいな感じかと思います。起動した段階ではMasterというRealmがすでに作成されているのですが、Masterを使用することは推奨されていないようなので別のRealmを作ります。
Realmの説明はこちらに載っていました。他にも色々とKeycloakで使われる用語の説明がありますね。
https://www.keycloak.org/docs/latest/server_admin/index.html#core-concepts-and-terms
左上のMasterにカーソルを合わせると add realm ボタンが出てくるので、そこから名前を入力して作成します。(画像はすでにDocumentServiceというRealmを作成した状態のものになります。)
Realmが作成できたらクライアントを登録しましょう。ここではClient ID を documentservice とし、Client Protocol を openid-connect としました。

スコープを追加します。スコープは read Protocol は openid-connect としました。

クライアントへスコープを割り当てます。Keycloakではクライアントごとに使用を許可するスコープを制御できるようになっていて、許可してあげないとエラーになります。
左のメニューから Clients を選び、 documentservice を選び、タブの中から Client Scopes を選びます。そして、次のように Assigned Default Client Scope に read スコープが割り当てられるようにします。

ユーザーを追加します。名前を適当に bob としました。

ユーザーにパスワードを設定します。ここは適当に password とし、 Temporary をオフにして設定します。念の為ですが本番の環境でこんなことしたら大変なことになります。今回はあくまでも勉強なのでこのあたりは適当です。

設定は終わったのでcurlでアクセストークンを取得してみます。Realm Settings の中に Endpoints があり、OpenID Endpoint Configuration があるのでクリックすると各エンドポイントがわかります。

このエンドポイントの仕様は OpenID Connect Discovery 1.0 として標準仕様としてまとめられているものの実装で、JSON形式でOpenID Providerの設定値を返します。
OpenID Connect Discovery 1.0 の Section 3 にJSONの中身についての説明が載っていました。
https://openid.net/specs/openid-connect-discovery-1_0.html#ProviderMetadata
その中から token_endpoint で指定されているURIがトークンを取得するエンドポイントとなるので、こいつに向けてアクセストークンくれとリクエストします。
 curl -XPOST http://localhost:8081/auth/realms/DocumentService/protocol/openid-connect/token \
     -u documentservice: \
     -H "Content-Type: application/x-www-form-urlencoded" \
     -d 'grant_type=password' \
     -d 'username=bob' \
     -d 'password=password' \
     -d 'scope=read' | jq .
  % Total    % Received % Xferd  Average Speed   Time    Time     Time  Current
                                 Dload  Upload   Total   Spent    Left  Speed
100  1730  100  1669  100    61  14144    516 --:--:-- --:--:-- --:--:-- 14661
{
  "access_token": "eyJhb....",
  "expires_in": 3600,
  "refresh_expires_in": 1800,
  "refresh_token": "eyJhbGc....",
  "token_type": "Bearer",
  "not-before-policy": 0,
  "session_state": "8fc8f351-a343-4a5a-95db-eb5a2ce58e6d",
  "scope": "read"
}
トークンの文字列が長いので適当に省略してますが、トークンを取得できました。
Spring Security を使ってリソースサーバーを作る
先程取得したアクセストークンを使ってアクセスする先のリソースサーバーを作っていきたいと思います。
過去記事で書きましたが Spring Security OAuth プロジェクトは非推奨となっているので、Spring Security のみを使って行きます。
Spring Initializer を使って必要な Starter を選択し、Spring Boot プロジェクトを作りました。pomはこちら。
<?xml version="1.0" encoding="UTF-8"?>
<project xmlns="http://maven.apache.org/POM/4.0.0" xmlns:xsi="http://www.w3.org/2001/XMLSchema-instance"
         xsi:schemaLocation="http://maven.apache.org/POM/4.0.0 https://maven.apache.org/xsd/maven-4.0.0.xsd">
    <modelVersion>4.0.0</modelVersion>

    <parent>
        <groupId>org.springframework.boot</groupId>
        <artifactId>spring-boot-starter-parent</artifactId>
        <version>2.4.2</version>
        <relativePath/> <!-- lookup parent from repository -->
    </parent>

    <groupId>com.example</groupId>
    <artifactId>demo</artifactId>
    <version>0.0.1-SNAPSHOT</version>
    <name>demo</name>
    <description>Demo project for Spring Boot</description>

    <properties>
        <java.version>11</java.version>
    </properties>

    <dependencies>
        <dependency>
            <groupId>org.springframework.boot</groupId>
            <artifactId>spring-boot-starter-security</artifactId>
        </dependency>
        <dependency>
            <groupId>org.springframework.boot</groupId>
            <artifactId>spring-boot-starter-web</artifactId>
        </dependency>
        <dependency>
            <groupId>org.springframework.boot</groupId>
            <artifactId>spring-boot-starter-oauth2-resource-server</artifactId>
        </dependency>
    </dependencies>

    <build>
        <plugins>
            <plugin>
                <groupId>org.springframework.boot</groupId>
                <artifactId>spring-boot-maven-plugin</artifactId>
            </plugin>
        </plugins>
    </build>

</project>
Configuration クラスを作ります。 scopeに基づいてアクセスできるエンドポイントをController側で制御しようと思ったので EnableGlobalMethodSecurity アノテーションを付与しています。
configureメソッドで保護するエンドポイントを指定し、リソースサーバーとしての機能を有効にしています。このあたりの設定についてはこちらのリファレンスに載ってます。
package com.example.demo.config;

import org.springframework.context.annotation.Configuration;
import org.springframework.security.config.annotation.method.configuration.EnableGlobalMethodSecurity;
import org.springframework.security.config.annotation.web.builders.HttpSecurity;
import org.springframework.security.config.annotation.web.configuration.WebSecurityConfigurerAdapter;

@Configuration
@EnableGlobalMethodSecurity(prePostEnabled = true)
public class SecurityConfig extends WebSecurityConfigurerAdapter {

    @Override
    protected void configure(HttpSecurity http) throws Exception {
        http.oauth2ResourceServer().jwt();
        http.authorizeRequests()
                .mvcMatchers("document/**").authenticated()
                .anyRequest().permitAll();
    }

}
application.properties で issuer-uri を指定します。このURIはKeycloakの画面で token_endpoint を確認した際のURIと同じものをセットします。
spring.security.oauth2.resourceserver.jwt.issuer-uri=http://localhost:8081/auth/realms/DocumentService/.well-known/openid-configuration
logging.level.org.springframework.security=debug
ここでテスト起動してみたらエラーが出てうまく行かない...。
Caused by: java.lang.IllegalArgumentException: Unable to resolve the Configuration with the provided Issuer of "http://localhost:8081/auth/realms/DocumentService/.well-known/openid-configuration"
    at org.springframework.security.oauth2.jwt.JwtDecoderProviderConfigurationUtils.getConfiguration(JwtDecoderProviderConfigurationUtils.java:99) ~[spring-security-oauth2-jose-5.4.2.jar:5.4.2]
    at org.springframework.security.oauth2.jwt.JwtDecoderProviderConfigurationUtils.getConfigurationForIssuerLocation(JwtDecoderProviderConfigurationUtils.java:62) ~[spring-security-oauth2-jose-5.4.2.jar:5.4.2]
    at org.springframework.security.oauth2.jwt.JwtDecoders.fromIssuerLocation(JwtDecoders.java:91) ~[spring-security-oauth2-jose-5.4.2.jar:5.4.2]
    at org.springframework.boot.autoconfigure.security.oauth2.resource.servlet.OAuth2ResourceServerJwtConfiguration$JwtDecoderConfiguration.jwtDecoderByIssuerUri(OAuth2ResourceServerJwtConfiguration.java:95) ~[spring-boot-autoconfigure-2.4.2.jar:2.4.2]
    at java.base/jdk.internal.reflect.NativeMethodAccessorImpl.invoke0(Native Method) ~[na:na]
    at java.base/jdk.internal.reflect.NativeMethodAccessorImpl.invoke(NativeMethodAccessorImpl.java:62) ~[na:na]
    at java.base/jdk.internal.reflect.DelegatingMethodAccessorImpl.invoke(DelegatingMethodAccessorImpl.java:43) ~[na:na]
    at java.base/java.lang.reflect.Method.invoke(Method.java:564) ~[na:na]
    at org.springframework.beans.factory.support.SimpleInstantiationStrategy.instantiate(SimpleInstantiationStrategy.java:154) ~[spring-beans-5.3.3.jar:5.3.3]
    ... 21 common frames omitted
URIの設定が間違っているようなので、調べ直したら issuer のURIを記載するところを設定値を取得するURIを記載していることに気がついたので、以下のように修正したら起動できました。.well-known/openid-configuration が不要だったらしいです。このあたりのURLごとの役割がまだちゃんと理解できていないっぽいですね。
spring.security.oauth2.resourceserver.jwt.issuer-uri=http://localhost:8081/auth/realms/DocumentService
logging.level.org.springframework.security=debug
保護されるエンドポイントを作っていきます。 @PreAuthorizeで read スコープを持っているトークンからのアクセスのみを許可するようにしました。JWTからAuthenticationにどうやって変換しているか気になりますね。引数にJwtを指定して、送られてきたJWTを取得できます。取得したJWTのクレームをコンソールに出力するようにしました。
package com.example.demo.controller;

import org.springframework.security.access.prepost.PreAuthorize;
import org.springframework.security.core.annotation.AuthenticationPrincipal;
import org.springframework.security.oauth2.jwt.Jwt;
import org.springframework.web.bind.annotation.GetMapping;
import org.springframework.web.bind.annotation.RequestMapping;
import org.springframework.web.bind.annotation.RestController;

@RestController
@RequestMapping("document")
public class DocumentController {

    @GetMapping
    @PreAuthorize("hasAuthority('SCOPE_read')")
    public String document(@AuthenticationPrincipal Jwt jwt) {
        jwt.getClaims().forEach((k, v) -> System.out.printf("Claim :%s \t Value :%s%n", k, v));
        return "document-1";
    }

}
動作確認
ではリソースサーバーのエンドポイントを叩いてみます。
curl localhost:8080/document -H 'Authorization: Bearer eyJhbGciOiJSUzI1NiIsIn...'
document-1
正しくレスポンスが帰ってきました。
リソースサーバーのコンソールには以下のようにJWTのクレームが出力されてます。
Claim :sub    Value :1e04c173-b80d-4bef-8bd3-9083cd2f8d8e
Claim :acr   Value :1
Claim :azp   Value :documentservice
Claim :scope     Value :read
Claim :iss   Value :http://localhost:8081/auth/realms/DocumentService
Claim :typ   Value :Bearer
Claim :exp   Value :2021-02-12T04:24:02Z
Claim :session_state     Value :697ac5ca-16d5-4c8d-a1ea-bd603bfa00d0
Claim :iat   Value :2021-02-12T03:24:02Z
試しに不正なトークンでも叩いてみましょう。トークンの文字列を適当に書き換えます。
curl localhost:8080/document -H 'Authorization: Bearer eyJhbGciOiJSUzI1NiIsI...' -v
*   Trying ::1...
* TCP_NODELAY set
* Connected to localhost (::1) port 8080 (#0)
> GET /document HTTP/1.1
> Host: localhost:8080
> User-Agent: curl/7.64.1
> Accept: */*
> Authorization: Bearer eyJhbGciOiJSUzI1NiIsI...
>
< HTTP/1.1 401
< WWW-Authenticate: Bearer error="invalid_token", error_description="An error occurred while attempting to decode the Jwt: Signed JWT rejected: Invalid signature", error_uri="https://tools.ietf.org/html/rfc6750#section-3.1"
< X-Content-Type-Options: nosniff
< X-XSS-Protection: 1; mode=block
< Cache-Control: no-cache, no-store, max-age=0, must-revalidate
< Pragma: no-cache
< Expires: 0
< X-Frame-Options: DENY
< Content-Length: 0
< Date: Fri, 12 Feb 2021 03:40:36 GMT
<
* Connection #0 to host localhost left intact
* Closing connection 0
署名の検証に失敗してアクセスが拒否されました。うまくいきましたね。